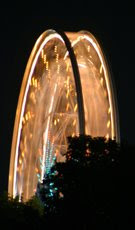
Long Exposures are the Secret This is one of the lesser known night time photography tips... it deals with cows. Did you think all the night time photography tips dealt with horses?
If you've ever heard the expression "till the cows come home," you will never think about it the same after today.
Why? Because I'm going to use a farm analogy to describe the relationship between shutter speed, aperture, and proper exposure.
During the day, with 1,000 cows in the field, you only have to leave the barn door (aperture) open a short ti me before 50 cows wander in and fill up the feeding station (equivalent of enough light to take a picture). Stay with me, here.
At night time, with only 85 cows remaining scattered about in the field, you need to leave the barn door open a much longer time before 50 cows wander in and fill up the feeding station.
Photography works the same way. During the day, since there is so much light available, the aperture (barn door) only needs to be open say, 1/500th of a second to accumulate all the light your camera needs to produce a high quality photograph.
However, at night time, with much less light available, the aperture needs to remain open a much longer time period (from 1/2 to 30 seconds) to accumulate the amount of light needed for a good photograph. The night time photography tip summary is:
Slow shutter speed =
Aperture remaining open longer =
Long Exposure
The only reason the photo above is more difficult to take at night than it would be during the day is that you need a tripod. Really, that's about it! OK, that's really not all of "it," but having a tripod is a significant step. As an alternative, you could try sitting the camera on a sturdy support (if you can find one), but it would have to be free from all vibrations.
See if your camera has a "night time" or "night scene" mode that implies using it during low-light situations. If it does, it will make things easier for you, but not necessaril
 y provide a higher quality photograph.
As a personal note, I prefer making the following types of adjustments myself rather than use the "Night time" setting on my camera. The reason being: the "night time" settings are locked in by the manufacturer and may not be ideal for each situation.
Therefore, if you have a unique situation, using the "automatically programmed" night setting may not generate the best photograph. Some night time photography tip, huh? On the other hand, you can always make Photoshop adjustments the next day to produce the perfect photo.
OK, end of my personal note and back to the non-cow night time photography tips. Without a night time scene mode, you need to get involved with a few settings. Let's first cover the...
Ideal Night Time Scenario
- The sky is clear with at least a 3/4 moon
- Temperature is between 45 - 80 degrees, and the weather is calm
- You can position the camera the perfect distance from your subject
- Your camera is on the tripod and ready for the shot
- With the small flashlight you always have in your camera bag, switch the camera mode to the equivalent of "Night Scene" mode
- Set the focus to "Manual," and set it to infinity.
- You trip the shutter with a remote shutter release or self-timer
That's all there is to it. But to truly understand these night time photography tips, let's quickly review what really happened...
- The only thing you did differently than for a typical daytime photograph was securing the camera to the tripod.
- Here's a "sort-of" night time photography tip: If your camera can use an external shutter release, consider getting one, especially if you plan on taking long-exposure shots.
Since camera shake is the greatest cause of ruined night time photographs, not touching your camera when you press the shutter is your best strategy.
- To avoid camera shake if you don't have an external shutter release, use the self-timer. Pressing the shutter button will usually cause small vibrations, but by the time the the self-timer runs down and the picture gets taken, all vibrations should have passed.
Technically, that doesn't fall under "night time photography tips" because it applies whenever you want to insure against camera shake, not just at night.
If your camera is capable of more control during long exposure situations,
- Set the ISO between 100 and 400
- Set the F-stop to around F/5.6
- Press the shutter
10 Bright Resources for Low-Light Techniques


No comments:
Post a Comment