 I've found a new love full of passion
Which has come to make me blind
When I found a special someone
In a love that's hard to find.
You've swept off my feet
From the very start
But before we go much further
Can I trust you with my heart?
Visit ۞ Photogallery ۞ for more intriguing pics
Friday, May 9, 2008
You make me feel...
I feel you....
You're the music that lives in me,
I'm united with it..
It plays orchestra of amour…
All I must do is fall into the arms
of summer breeze thinking it's You.. my melody...
My senses are genuine.. all I truly know is what I feel...
the melody of my heart
that sails through the seas of my soul,
and carries wind with the pledge of my love to You...
the wind that caresses me gently in the ambience of eternity...
Sunset capture tips!!

Sunset photographs have always been extremely popular. Not only are they beautiful, but they also have an almost magical ability to bring back fond memories of your tropical vacation.
Most beginning photographers incorrectly believe that capturing one of these colorful beauties is beyond their ability.
However, anyone can photograph a sunset and produce at least a relatively good result.
However, if you want to photograph sunsets that stop people in their tracks, you're in the right place. But to go from "that's nice" to "WOW", we need to cover a few things.The Right Conditions for Sunset Pictures
You need 2 environmental conditions in order to have a chance capturing a stunning sunset:
DUST and CLOUD in air
The red-orange of the setting sun results from dust (or other microscopic particles) in the air. Dust comes from everywhere: the ground, smoke, industrial pollution... to name a few.
Clouds also add a critical factor. Thick clouds or wispy ones - it doesn't matter. Each will provide a unique effect. Don't get me wrong. I've taken plenty of sunset pictures on cloudless evenings without any dust in the air. But, they all result in fairly bland photos. Don't Center the Horizon on Sunset Pictures
The worst thing you can do with sunset pictures is to compose the shot so that the horizon is in the center of the picture.As a general rule, the more beautiful the sky, the more of it you want to show. The more interesting the foreground, the more of it you want to show.
Of course, you want to use good rules of composition and common sense. Bottom line, if the horizon is approximately at the top or bottom one third of the frame, your sunset pictures will be more appealing.Composition
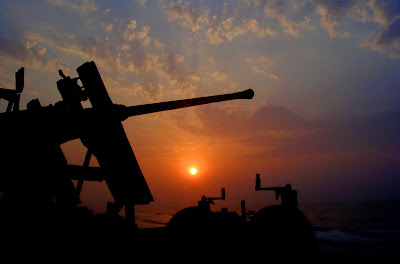
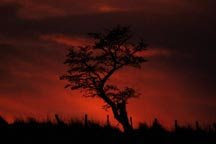
Your sunset photos will be significantly improved when you include a foreground object(s) silhouetted against the background sky.

Make sure your camera is set to the "no flash" option. (See the following section on exposure.)
The most common foreground objects when photographing sunsets are people, trees, or unusual objects (or, normal objects seen differently).
However, let your creativity out and you will be pleasantly surprised at what you come up with.
Even the most spectacular sunset will look like abstract wallpaper if you don't provide some context. Silhouetted trees or other objects in the foreground give a sense of scale and location to the scene. A stunning sunset will have a different feeling if it's taken at the beach with a few palm trees in the foreground.
The Right Exposure for Sunset Pictures
Without question, the most challenging part of taking sunset photos involves what exposure to use. Here's the bad news: there is no one right answer.And, for the good news ... several different exposures will produce excellent (but different) results.
Nowhere else in photography does the suggestion to experiment hold more weight, than when photographing sunset pictures. Using your camera's built-in metering mode will often result in the sky registering as relatively bright, and therefore will underexpose the entire image.
As you recall, when any given image has a huge range between light and dark, achieving the optimum exposure is a challenge.
If matrix metering is used, everything is averaged with the likely result being a darker-than-desired sunset picture. One way to handle this is with a light meter (or flash meter) depending on your overall use.
There are two approaches to get around this issue. The first approach is called bracketing the shot. Bracketing is used to get the best exposure, by gong through an educated trial and error.
To accomplish bracketing, you either need to be able to manually set the aperture and exposure time, or your camera needs to have a bracketing function (available on most digital SLRs).
For whatever metering mode you're using, your camera indicates the correct exposure for a particular photograph.
Let's say it is 1/60 of a second at f/8.
The first thing to do, is take the picture exactly according to your camera's recommendations.
Next, manually change the f-stop to f/5.6 (one stop more exposure) while keeping the exposure time at 1/60th of a second. Then, take another shot using f/11 (one stop less exposure).
If your sunset picture has the potential of true greatness, I would suggest taking additional shots at different exposure combinations.
Chances are good that although each image will be lighter or darker than its companion picture, you will find at least one that hits the mark. The two sunset pictures below are almost identical, except for the bracket differences. As you can see, a one stop difference on exposure can make a big difference in the final image.
 | |

This is what you do... First, point your camera at a bright part of the sky (not directly at the sun), activate the auto exposure lock, recompose the entire sunset picture and take the shot. Next, point your camera at the darkest part of the scene, lock in the auto exposure, recompose and take the shot.
Every time you meter against a different part of the scene and lock in the exposure for that section; your overall recomposed image will come out slightly different.
Be creative. Try what you think won't work. You may create a truly spectacular result.
If you haven't tried shooting sunrises or sunsets before, you'll be impressed with the results and the effects that more or less exposure can have on the final image.
Experiment. There is no "right" exposure. Since many exposures will be over 1 - 2 seconds, use a remote release or shutter release cable for your camera, and a tripod for stability.
Timing
Sunsets are not static. They change over time. When you prepare to take sunset pictures, plan to spend at least 45 minutes to choose the perfect location, set up your equipment, and take your readings.
It's a good idea to photograph the scene every few minutes or so. Clouds move, colors deepen and change, and the image you record a 15 minutes later may have more drama and richer colors than you saw earlier. This is definitely the time you want to take lots and lots of pictures. When you check the results on your computer, delete the "also-rans."
Night photography tips
Long Exposures are the Secret This is one of the lesser known night time photography tips... it deals with cows. Did you think all the night time photography tips dealt with horses?
If you've ever heard the expression "till the cows come home," you will never think about it the same after today.
Why? Because I'm going to use a farm analogy to describe the relationship between shutter speed, aperture, and proper exposure.
During the day, with 1,000 cows in the field, you only have to leave the barn door (aperture) open a short ti me before 50 cows wander in and fill up the feeding station (equivalent of enough light to take a picture). Stay with me, here.
At night time, with only 85 cows remaining scattered about in the field, you need to leave the barn door open a much longer time before 50 cows wander in and fill up the feeding station.
Photography works the same way. During the day, since there is so much light available, the aperture (barn door) only needs to be open say, 1/500th of a second to accumulate all the light your camera needs to produce a high quality photograph.
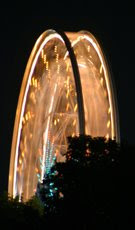
However, at night time, with much less light available, the aperture needs to remain open a much longer time period (from 1/2 to 30 seconds) to accumulate the amount of light needed for a good photograph. The night time photography tip summary is:
Slow shutter speed =
Aperture remaining open longer =
Long Exposure
The only reason the photo above is more difficult to take at night than it would be during the day is that you need a tripod. Really, that's about it! OK, that's really not all of "it," but having a tripod is a significant step. As an alternative, you could try sitting the camera on a sturdy support (if you can find one), but it would have to be free from all vibrations.
See if your camera has a "night time" or "night scene" mode that implies using it during low-light situations. If it does, it will make things easier for you, but not necessaril
 y provide a higher quality photograph.
As a personal note, I prefer making the following types of adjustments myself rather than use the "Night time" setting on my camera. The reason being: the "night time" settings are locked in by the manufacturer and may not be ideal for each situation.
Therefore, if you have a unique situation, using the "automatically programmed" night setting may not generate the best photograph. Some night time photography tip, huh? On the other hand, you can always make Photoshop adjustments the next day to produce the perfect photo.
OK, end of my personal note and back to the non-cow night time photography tips. Without a night time scene mode, you need to get involved with a few settings. Let's first cover the...
Ideal Night Time Scenario
- The sky is clear with at least a 3/4 moon
- Temperature is between 45 - 80 degrees, and the weather is calm
- You can position the camera the perfect distance from your subject
- Your camera is on the tripod and ready for the shot
- With the small flashlight you always have in your camera bag, switch the camera mode to the equivalent of "Night Scene" mode
- Set the focus to "Manual," and set it to infinity.
- You trip the shutter with a remote shutter release or self-timer
That's all there is to it. But to truly understand these night time photography tips, let's quickly review what really happened...
- The only thing you did differently than for a typical daytime photograph was securing the camera to the tripod.
- Here's a "sort-of" night time photography tip: If your camera can use an external shutter release, consider getting one, especially if you plan on taking long-exposure shots.
Since camera shake is the greatest cause of ruined night time photographs, not touching your camera when you press the shutter is your best strategy.
- To avoid camera shake if you don't have an external shutter release, use the self-timer. Pressing the shutter button will usually cause small vibrations, but by the time the the self-timer runs down and the picture gets taken, all vibrations should have passed.
Technically, that doesn't fall under "night time photography tips" because it applies whenever you want to insure against camera shake, not just at night.
If your camera is capable of more control during long exposure situations,
- Set the ISO between 100 and 400
- Set the F-stop to around F/5.6
- Press the shutter
10 Bright Resources for Low-Light Techniques
Search This Blog
Tips for great Pictures!!
Direct eye contact can be as engaging in a picture as it is in real life. When taking a picture of someone, hold the camera at the person's eye level to unleash the power of those magnetic gazes and mesmerizing smiles. For children, that means stooping to their level. And your subject need not always stare at the camera. All by itself that eye level angle will create a personal and inviting feeling that pulls you into the picture.
Use a plain background
A plain background shows off the subject you are photographing. When you look through the camera viewfinder, force yourself to study the area surrounding your subject. Make sure no poles grow from the head of your favorite niece and that no cars seem to dangle from her ears.
Use flash outdoors
Bright sun can create unattractive deep facial shadows. Eliminate the shadows by using your flash to lighten the face. When taking people pictures on sunny days, turn your flash on. You may have a choice of fill-flash mode or full-flash mode. If the person is within five feet, use the fill-flash mode; beyond five feet, the full-power mode may be required. With a digital camera, use the picture display panel to review the results.
The flash will brighten up people's faces and make them stand out. Also take a picture without the flash, because the soft light of overcast days sometimes gives quite pleasing results by itself.
Auto focus problems
Sometimes the object for focus is too small compared to its background, for example you are trying to focus onto a single thin and tiny leaf, the camera may not be able to auto-focus on it. So place fist or any other object nearby the leaf and allow the camera to auto-focus at that position. Thereafter remove the object and click your shot!! I took snapped those red-ants on the orchids in a similar way.


